Posts

Showing posts from May, 2022

difference between enable rule vs display rule in ribbon workbench

 Enable Rule: It is the client side process.  Let's start with example:  I have an account entity under that I have more than two form. I just want to show the specific button based on the particular form you can use enable rule here. Display Rule: It is server side process. Let's start with example: I want to show and hide the button based on the security role then we will go for display rule. Note: For latest dynamic CRM interview question please click  Here .
Trigger one flow from other in Power Automate

Image
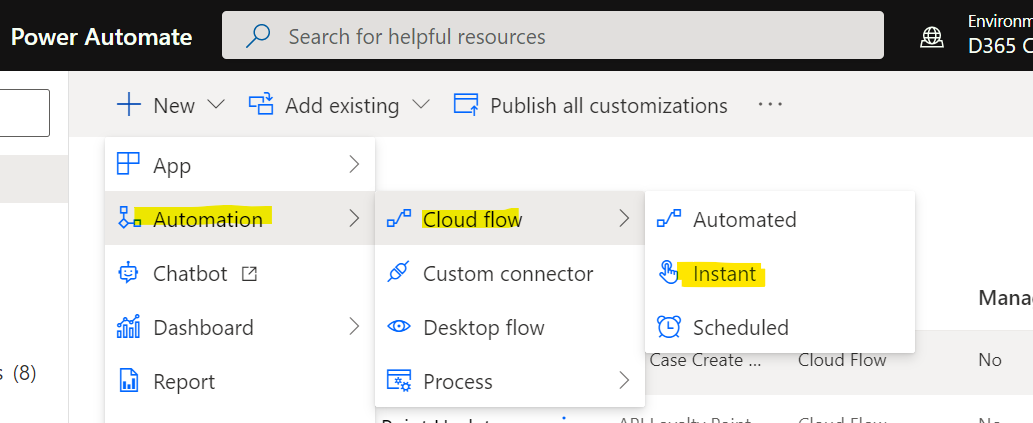
 Now create one follow as a parent workflow. Go To Power Automate  click on  New--->Automation--->cloud flow-->Instant.   Now create the Manually Trigger Flow.   Now just adding one step data operation compose action.   In input parameter of compose action just write some text here I have given "This is the parent flow". Now I am going to create child flow. Please follow the above two screenshot to create the another flow as a child flow.  I have given input parameter as a text "ItemId". And In input parameter of compose action I have concat ('this is the child flow', ItemId(dynamically)).  Now next step is Response to a power app or flow and add Output response(In Title) and Success(Enter value).   Now Open the Parent Flow and add step run a child flow. Note : You will find the run a child flow action only on your workflow in same solution if your workflow in different solution will not able to find run a child flow action. Now select the child flo

Send an email when a new record is created in Dynamic CRM

Image
 In my case when contact is created then send the email. Step 1: Choose the Microsoft Data Verse.    now select the Action Add a new row. select the change type, table name or scope.   Step 2: Choose  Microsoft Data verse For generate the case link.   select the list of the records and select the table name as a configuration setting. expend the above list configuration setting and provide the fetch XML Query. for XML query go to advance find and download the xml query and put under fetch xml query area. I have created one record as a environment URL in configuration setting. Step 3: Initialize the variable  Now give the variable name, type , value. Now in value We have give output like  @{outputs('List_config_URL_Fetch')?['body/value'][0]?[' publiser_value' ]}&forceUCI=1&pagetype=entityrecord&etn=contact&id=@{triggerOutputs()?['body/contactid']} Step 5: Now add the new row in Microsoft Data verse and select table name as Email Message

Convert Time Zone UTC to IST in Power Automate

Image
 Step 1: Let fetch on Modified On filed from table.  here I am using cases entity and their filed. Step 2: Take a variable and define the name, type, value. Now once you display this value it will directly take UTC format. To convert UTC to IST. Follow the below step. Now in email templet we can use under description above converted time.  Perform bond action upon sending the email.